

Get started
Build a Connection-Allowlist from your reports. Pick a period, start from your own origin, review the destinations, then deploy in report-only mode.
Last update:
This page takes you from the reports your website already collects to a Connection-Allowlist deployed in report-only mode, then enforced.
Review every destination, and deploy in report-only first
Any script on your pages can send data to a destination the list allows, so allow only the destinations you recognize. The builder's defaults allow every reported destination that is not noise, and a reported destination is not proof that your pages connect to it.
Always deploy a new list with the Connection-Allowlist-Report-Only header first. Switch to Connection-Allowlist only once a week or more of reports shows that nothing your pages need would be blocked.
Before you begin
Make sure you have:
- A website connected to CentralCSP. Refer to Connect your site.
- Access to the server, framework, or content delivery network (CDN) configuration that sets your response headers.
The builder learns from Connection-Allowlist reports, and browsers send them only once your site serves a Connection-Allowlist header. If the reports page is empty, run the builder once with Only your own origin, deploy the result in report-only mode, and come back after a week. Every connection outside your own origin is then reported, and the builder has destinations to learn from. For how to narrow what you observe, refer to Build the list from traffic.
Keep the tab open until you export
The builder saves nothing. The step, the period, and the starting policy stay in the page address, but your allow and reject decisions live only in the open page. Reloading or closing the tab clears them.
1. Choose the reports to learn from
To choose the period:
- In the website sidebar, go to Builders > Connection-Allowlist.
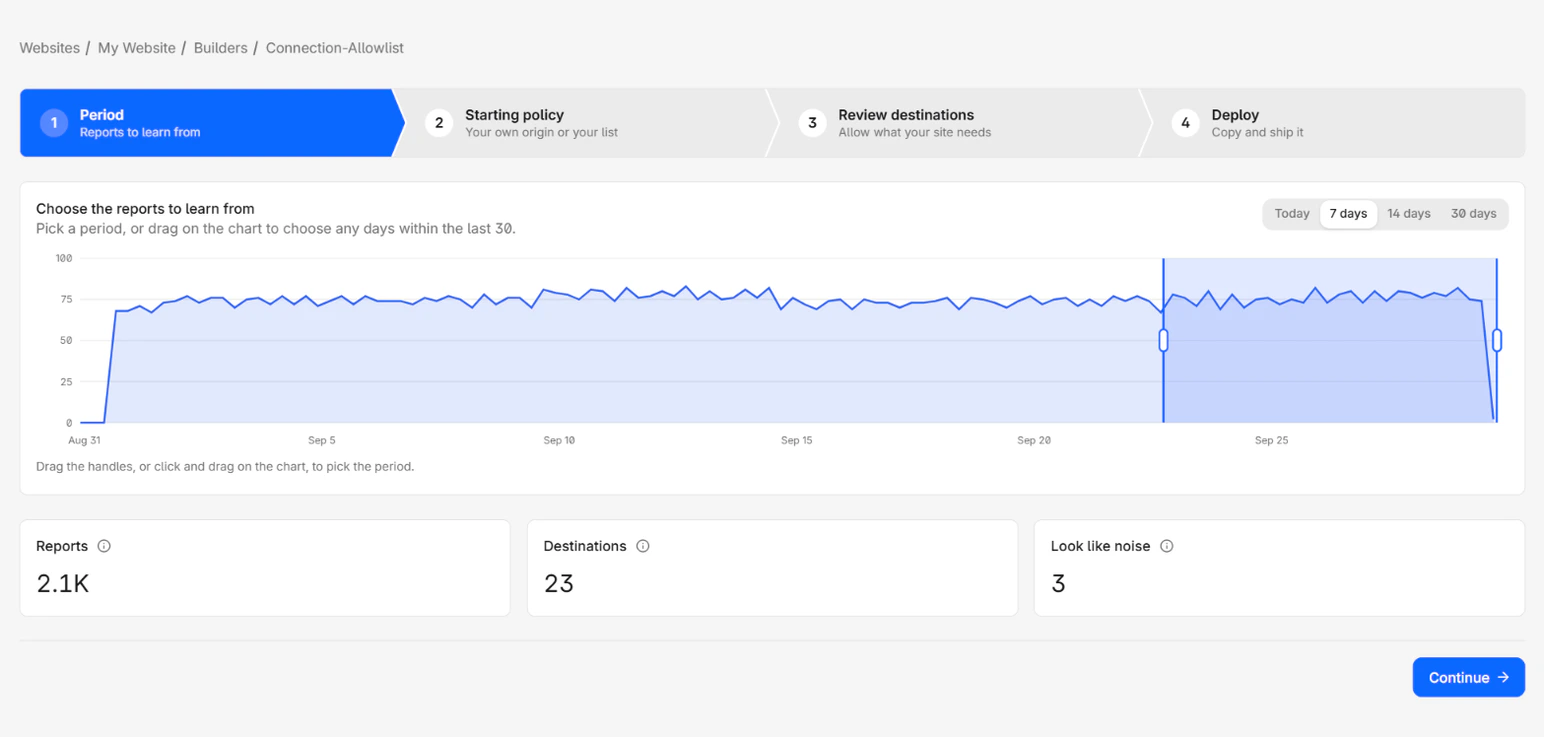
- On the Period step, select Today, 7 days, 14 days, or 30 days. For any other range within the last 30 days, drag across the report chart instead.
- Check the three counters: Reports, Destinations, and Look like noise.
- Select Continue.
The default period is 7 days. Today is the current calendar day in your timezone, not the last 24 hours. A website that sends a very large volume of reports is limited to 7 days at a time, and the 14 days and 30 days options are hidden.
If the period holds no reports, the page shows Browsers sent no Connection-Allowlist reports in this period. Pick a longer period, or continue from your own origin or a pasted list.
2. Pick a starting policy
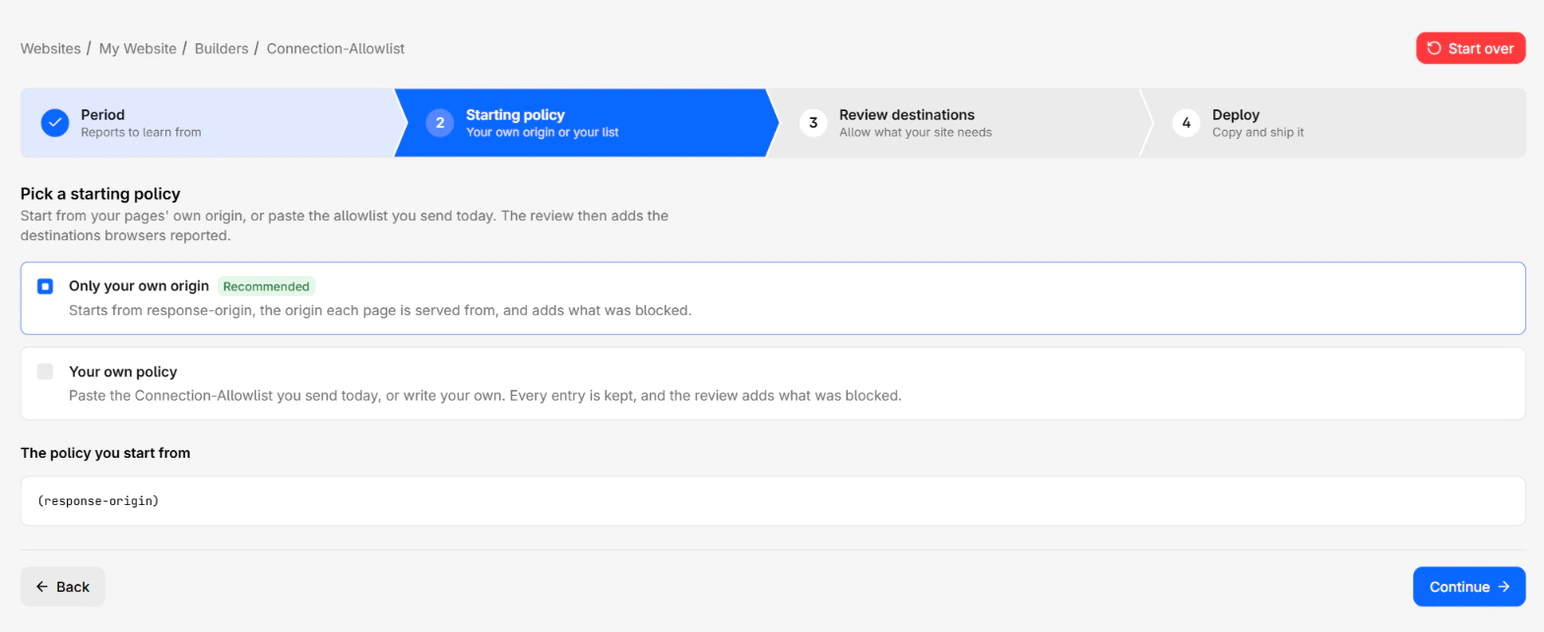
The page offers two starting points. Only your own origin is marked Recommended and is selected by default.
To pick the starting policy:
- On the Starting policy step, choose one option:
- Only your own origin: Starts from
(response-origin), the origin each page is served from, and adds what was blocked. - Your own policy: Paste the Connection-Allowlist value you send today, or write your own. Every entry is kept.
- Only your own origin: Starts from
- If you picked Your own policy, paste the header value without the header name, such as
(response-origin "https://api.example.com"); report-to=centralcsp. - Check the value under The policy you start from.
- Select Continue.
The builder never offers a list read from the reports, because a report can be forged. Refer to Why it never starts from a reported list.
3. Review the destinations
The step opens with the Redirects setting, then a table of every destination your pages tried to reach. Each row is already decided, with the destinations your pages use allowed and noise rejected.
To review the destinations:
- In the Redirects card, leave Block selected unless your pages rely on a redirect through another site, such as a sign-in or payment step. In that case, select Allow, which adds
redirects=allowto the list. - Set the flag filter to Noise. If a noise row holds a destination your site really uses, select Add.
- Check the WebRTC section. If your pages make no video or voice calls, select Reject.
- Check each site section. When a
https://*.pattern row is added, it allows every subdomain of that site, including ones not in the reports. Reject it to decide on each subdomain alone. - Select Reject on every destination you do not recognize.
- Select Continue.
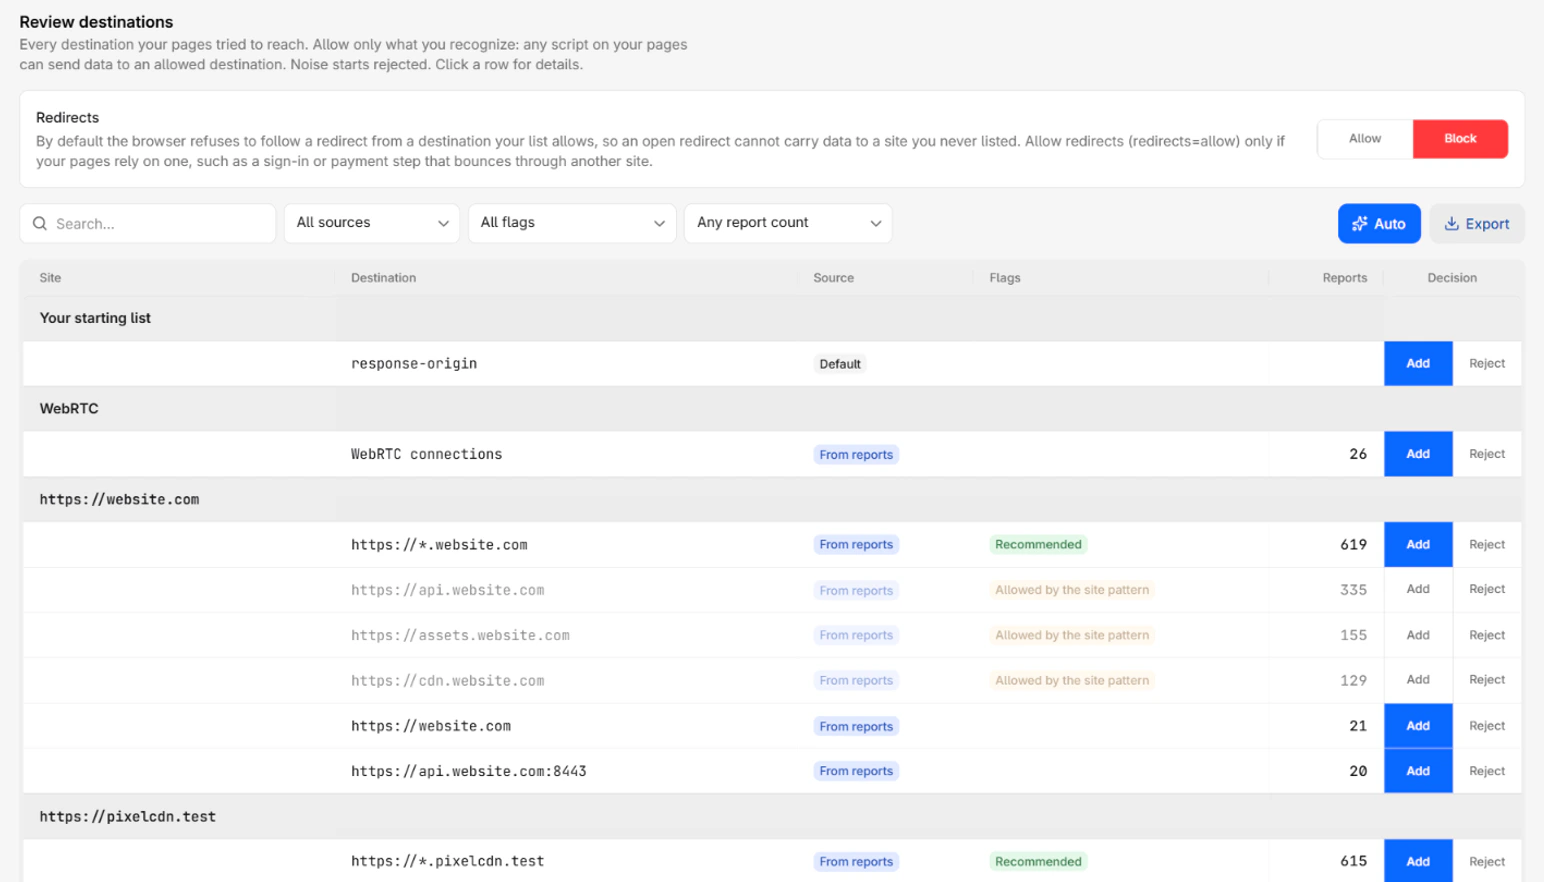
To put every decision back to the builder's recommendation, select Auto. For each section, flag, and filter, refer to Review destinations.
4. Deploy in report-only mode
To deploy the list:
- On the Deploy step, leave the mode on Report-only.
- In the code block, copy both headers, or select Export as TXT to download both headers in a text file. The export is recorded in the audit log.
- Add both headers to every HTML response your site returns.
The headers look like this example. The first declares your website's CentralCSP endpoint:
Reporting-Endpoints: centralcsp="https://MyEndpoint.report.centralcsp.com", default="https://MyEndpoint.report.centralcsp.com"The second carries the list:
Connection-Allowlist-Report-Only: (response-origin "https://*.example.com" "https://api.example.net" "wss://chat.example.net"); report-to=centralcspThe report-to=centralcsp parameter sends reports to the group that the Reporting-Endpoints header declares.
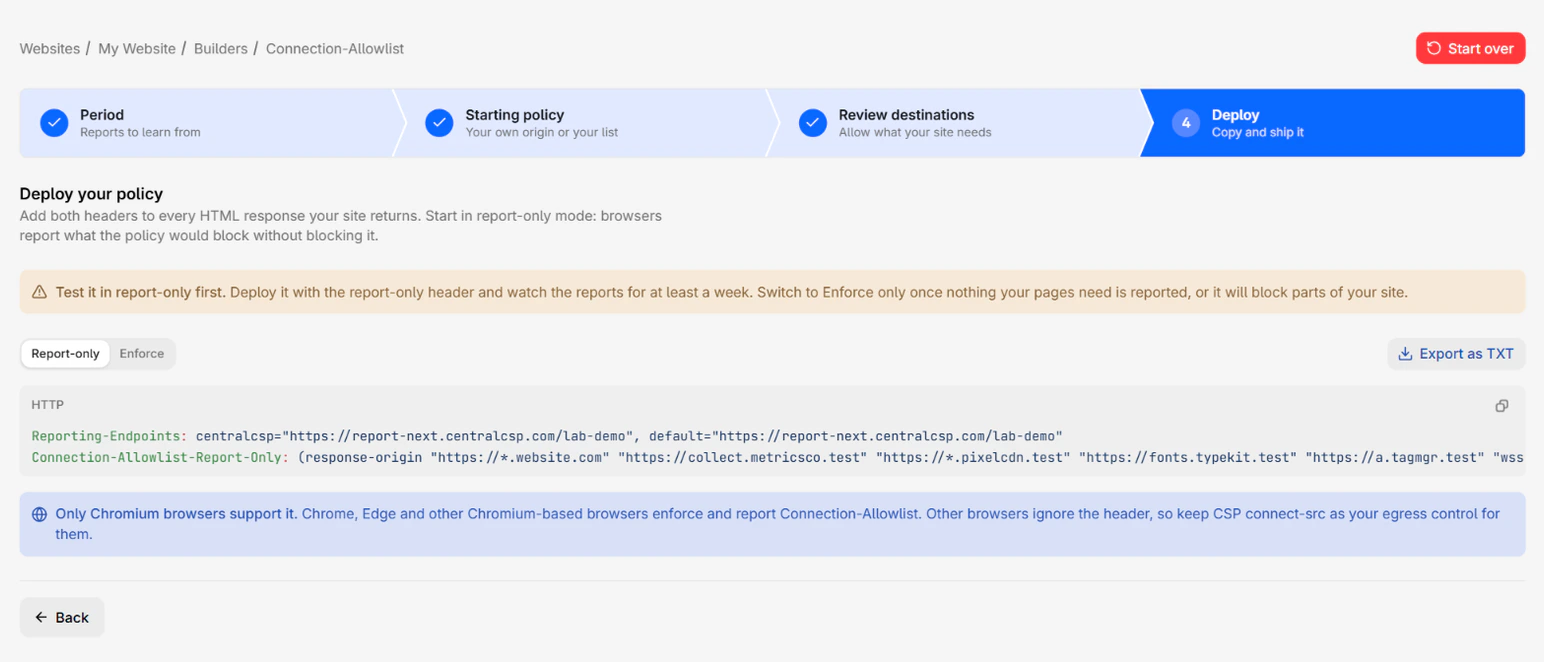
Only Chromium-based browsers support Connection-Allowlist, as the note under the headers says. Keep the Content Security Policy connect-src directive in place for every other browser.
Browsers that support the header now report what the list would block, without blocking it.
5. Switch to enforce mode
To enforce the list:
- Watch the Connection-Allowlist reports page for at least a week. Each report now means the list would block a connection.
- When nothing your pages need shows up in the reports, run the builder again on that week. Pick Your own policy and paste the list you deployed, so its entries are kept.
- On the Deploy step, select Enforce.
- Replace the report-only header with the
Connection-Allowlistheader.
Browsers that support the header now block every connection the list does not allow.
Next steps
Overview
Generate a Connection-Allowlist header from the reports browsers send. Start from your own origin, allow the destinations you recognize, then deploy.
Review destinations
On the Review destinations step, decide which origins go into your Connection-Allowlist. Redirects, sections, site patterns, filters, and the details panel.