

Get started
Build a Content Security Policy from your reports with the CSP builder. Pick a period and a starting policy, review sources, then deploy in report-only mode.
Last update:
This page takes you from the reports your website already collects to a Content Security Policy (CSP) deployed in report-only mode, then enforced.
Review every value, and deploy in report-only first
The builder suggests values from what browsers reported, and its defaults keep everything your pages load today, including risky values and scripts you may not recognize. Review the values before you deploy a new policy, starting with the risk flags and the script sources you do not know. A policy from the API or the MCP tool applies the same defaults with no review, so check it the same way.
Always deploy a new policy with the Content-Security-Policy-Report-Only header first. Switch to Content-Security-Policy only once a week or more of reports shows that nothing your pages need would be blocked.
Before you begin
Make sure you have:
- A plan that collects CSP violation reports. Compare plans.
- A website that sends CSP reports to CentralCSP. The CSP violations page must show data. If your site sends no policy yet, the builder starts from the CentralCSP baseline. Refer to Connect your site.
- Access to the server, framework, or content delivery network (CDN) configuration that sets your response headers.
Decide how long a period to learn from before you start. A longer period catches pages that few visitors open, such as checkout or account settings.
Keep the tab open until you export
The builder saves nothing. The step, the period, and the starting policy stay in the page address, but your add and reject decisions live only in the open page. Reloading or closing the tab clears them.
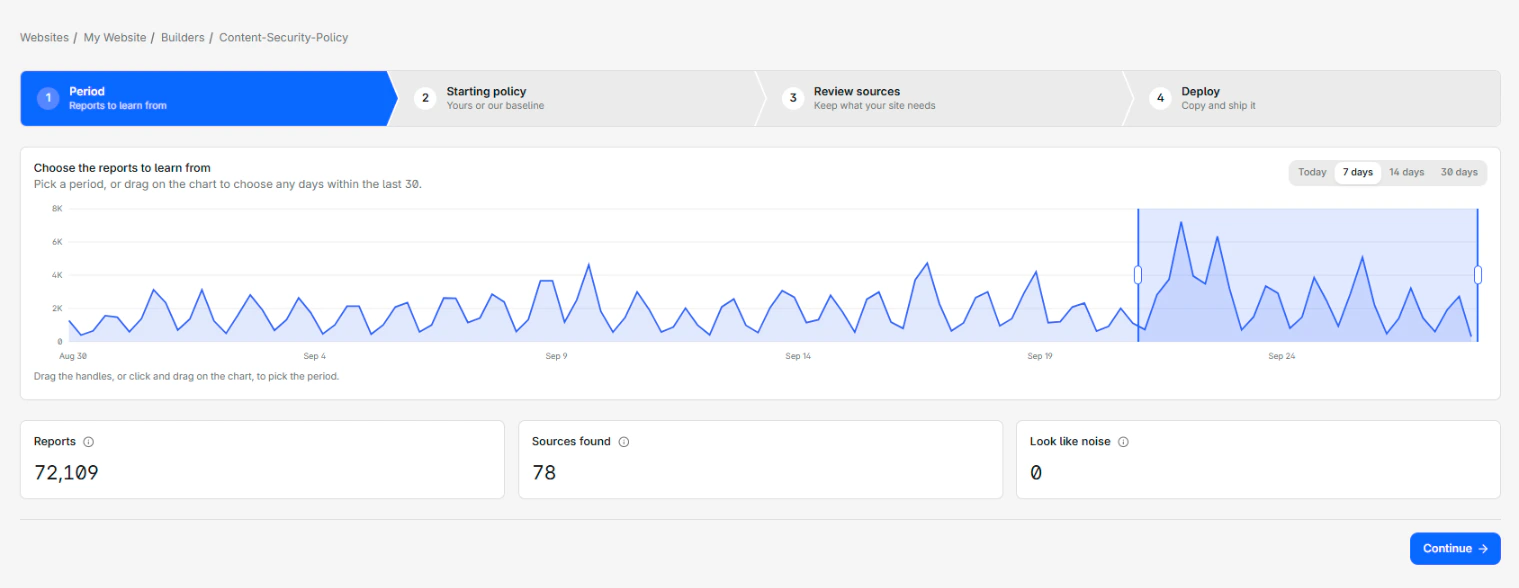
1. Choose the reports to learn from
To choose the period:
- In the website sidebar, go to Builders > Content-Security-Policy.
- On the Period step, select Today, 7 days, 14 days, or 30 days. For any other range within the last 30 days, drag across the report chart instead.
- Check the three counters: Reports, Sources found, and Look like noise.
- Select Continue.
The default period is 7 days. Today is the current calendar day in your timezone, not the last 24 hours. A website that sends a very large volume of reports is limited to 7 days at a time.
If the period holds no reports, the page shows No reports in this period. Pick a longer period, or continue and start from the baseline.
2. Pick a starting policy
The page lists the CentralCSP baseline, then up to six policies Detected on your website. The option marked Recommended is selected by default.
To pick the starting policy:
- On the Starting policy step, read the label of each detected policy:
- Live policy: Very likely the policy you serve today.
- Partial policy: Part of your site, a staging copy, or a second header.
- Old policy: No reports for two days, probably replaced.
- (Optional) To read the full policy of an option, select Details.
- To keep what works today, select the live policy. To start from a strict policy with nothing allowed yet, select CentralCSP baseline.
- Select Continue.
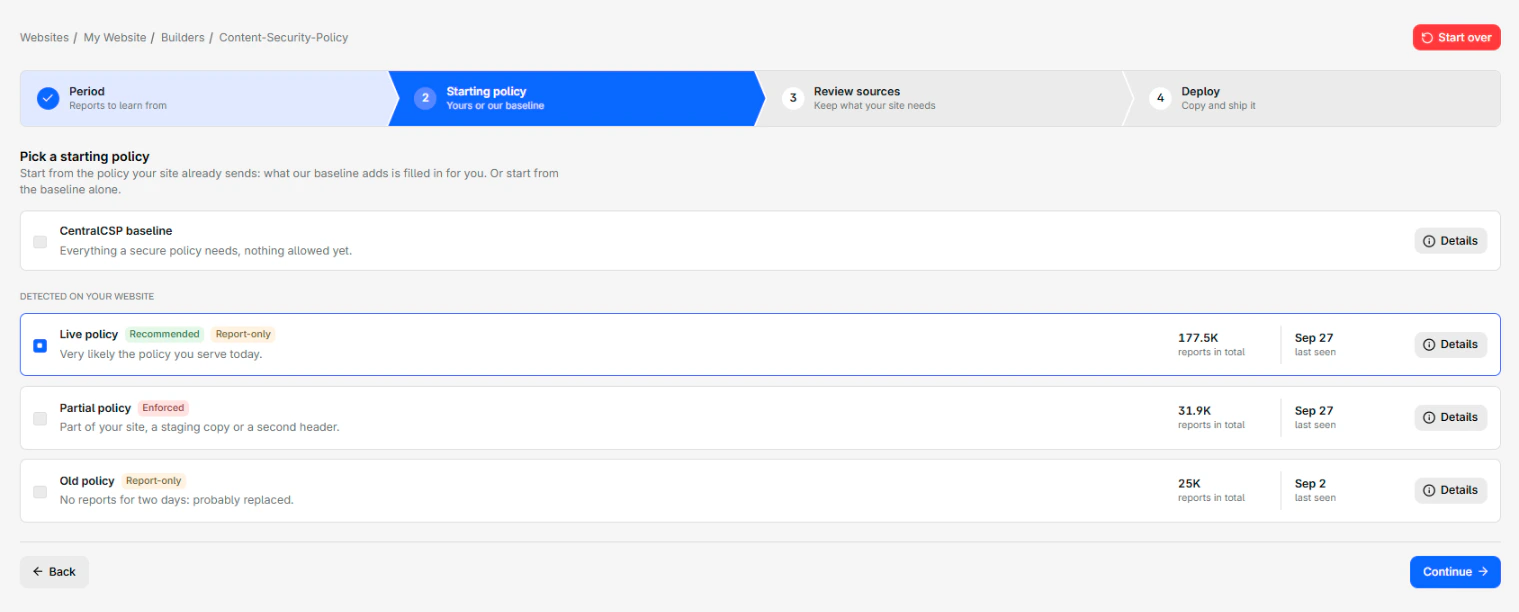
When you start from a detected policy, the builder keeps every value it holds and adds what the baseline has and it lacks. Refer to The CentralCSP baseline.
3. Review the sources
The table lists every value of the policy you are building. Each row is already decided, with the sources your pages need added and noise rejected.
To review the table:
- On the Review sources step, set the flag filter to Noise.
- Check each noise row. If one holds a host your site really uses, select Add.
- Set the flag filter to each risk level, starting with the most severe.
- To read what a risky value allows and how to remove it later, select its row.
- (Optional) Select Reject on values you are sure your pages no longer need.
- Select Continue.
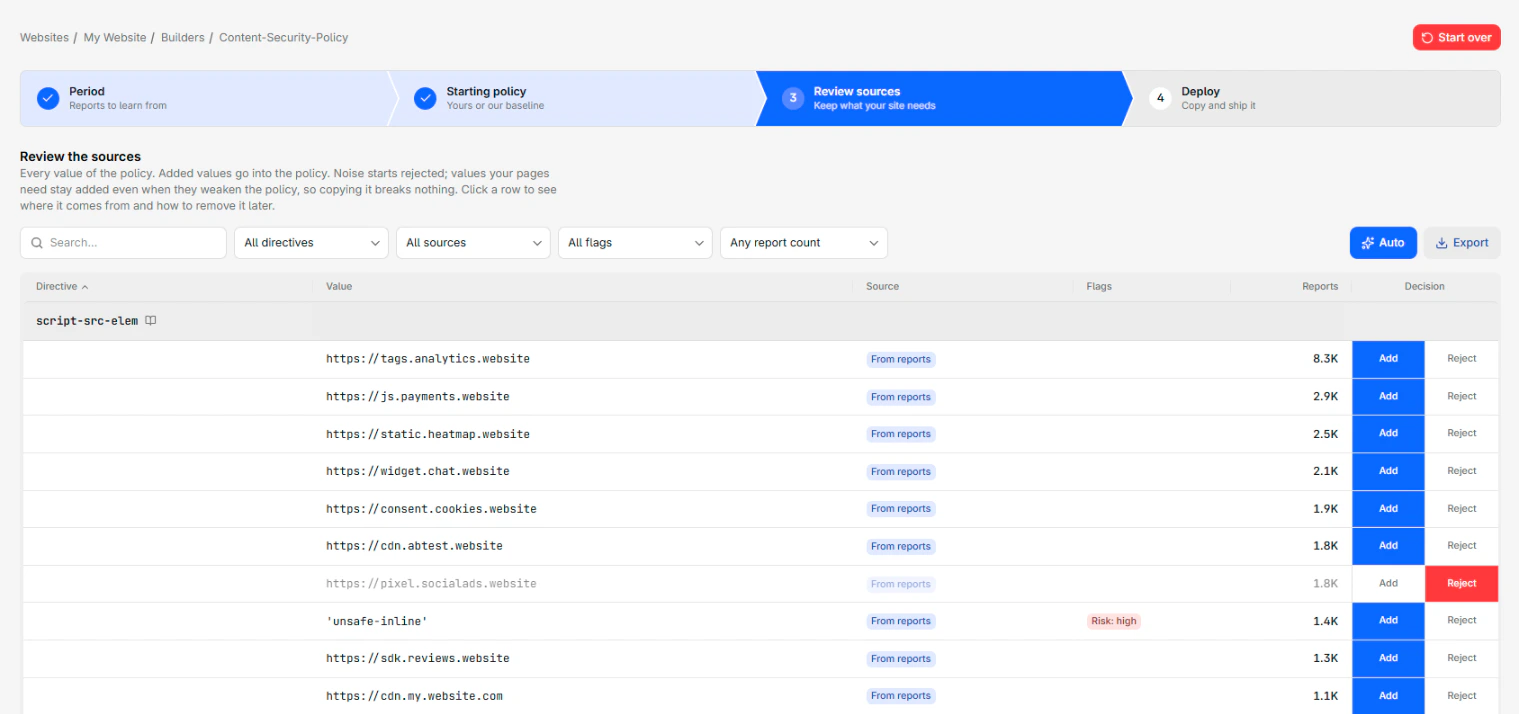
To put every decision back to the builder's recommendation, select Auto. For each column, filter, and callout, refer to Review table.
4. Deploy in report-only mode
To deploy the policy:
- On the Deploy step, leave the mode on Report-only.
- In the code block, copy both headers, or select Export as TXT.
- If the page shows Replace {RANDOM} on every response, your policy uses a nonce. Generate a new random value for each response, and put it in the header and in the
nonceattribute of every script tag. Refer to Nonces and unsafe-inline. - Add both headers to every HTML response your site returns. For per-framework code, refer to Set the CSP header in every framework.
The headers look like this example:
Reporting-Endpoints: centralcsp="https://e0123456789abcdef0123.report.centralcsp.com", default="https://e0123456789abcdef0123.report.centralcsp.com"
Content-Security-Policy-Report-Only: default-src 'self'; script-src 'self' 'report-sample' 'report-sha256' https://cdn.example.com; style-src 'self' 'report-sample'; object-src 'none'; base-uri 'self'; form-action 'self'; frame-ancestors 'none'; upgrade-insecure-requests; report-uri https://e0123456789abcdef0123.report.centralcsp.com; report-to centralcsp
The report-to centralcsp directive sends reports to the group that the Reporting-Endpoints header declares. The Policy and Findings tabs grade the policy with the CSP evaluator.
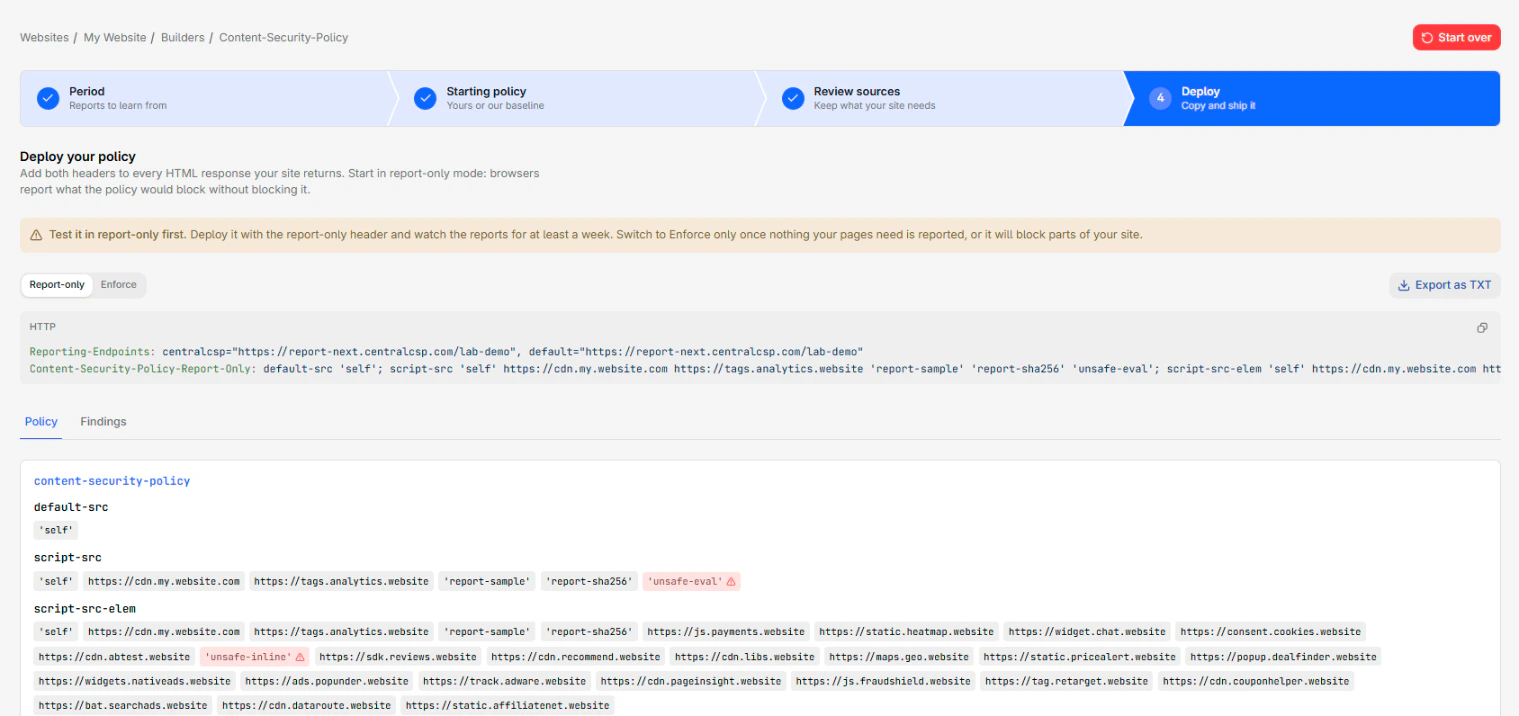
Browsers now report what the policy would block, without blocking it.
5. Switch to enforce mode
To enforce the policy:
- Watch the CSP violations page for at least a week. Each report now means the policy would block something.
- When nothing your pages need shows up in the reports, run the builder again on that week. The policy you deployed is now the live policy, so start from it.
- On the Deploy step, select Enforce.
- Replace the report-only header with the
Content-Security-Policyheader.
Browsers now block what the policy does not allow. For the trade-offs between the two modes, refer to CSP enforce vs report-only.
Next steps
Overview
The CSP builder writes a Content Security Policy for your website from the CSP violation reports browsers sent, then grades it before you deploy it.
Review table
In the CSP builder, the review table decides which values go into your Content Security Policy. Columns, default decisions, filters, and the details panel.